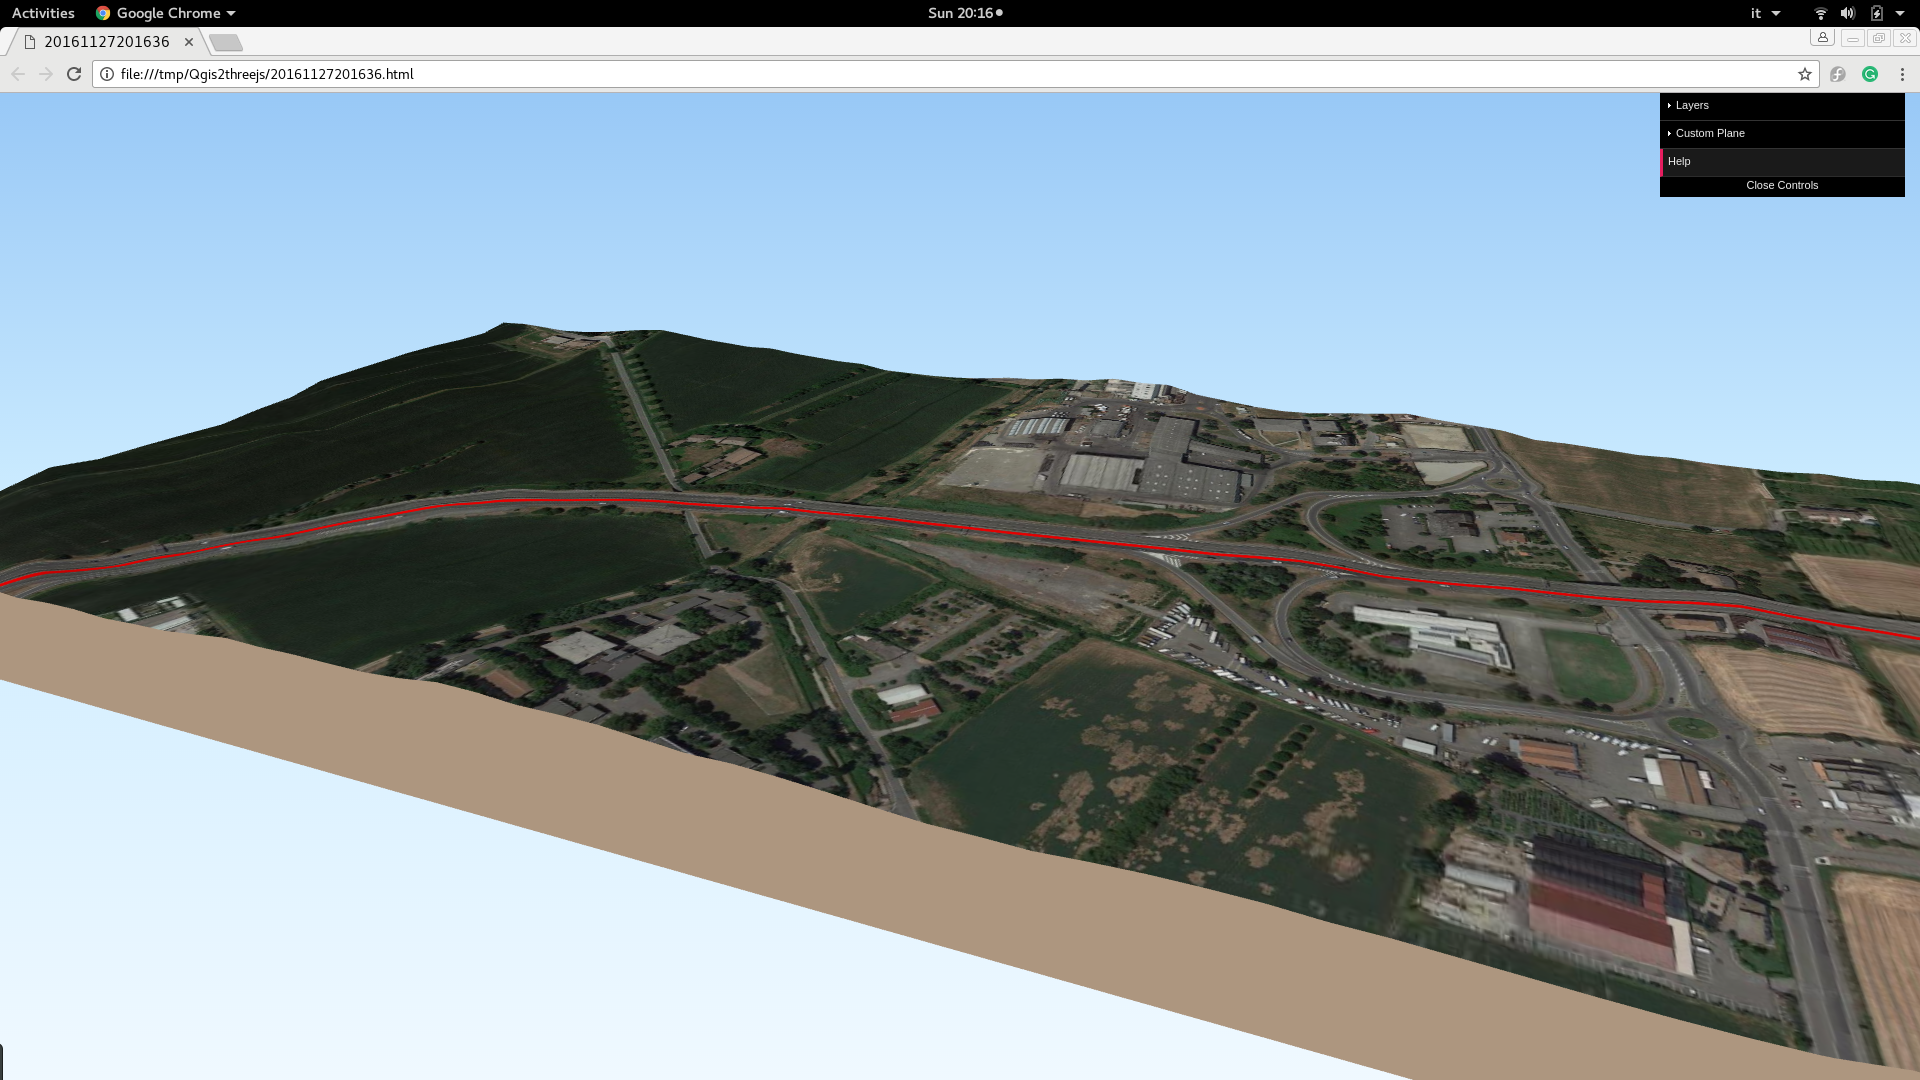
GPSLogger track visualized over a 3D Landscape with QGIS
Our GPSLogger has been around for awhile, over the time the number of practical applications increased steadily; this and similar articles aim to expose some of them. We will show ho to import our logged data into a Geographic Information System or GIS and visualize the recorded path over a 3D landscape. In particular, we will use the free and cross-platform QGIS (2.14.3). Screenshots have been acquired on a Fedora 25 Linux PC. An advantage of the use of GIS is the possibility to programmatically store data, process data and to integrate information from different sources. We will show here how to use earth digital elevation model or DEM data. Our DEM data source is the ASTER project satellite collected information; alternative models are available but we prefer ASTER because since the first of April of this year the data from Aster project is provided online and free of charge. QGIS is multi-layer so we can select when and if to show, overlap or hide information from different sources. To work with GIS comfortably we use a Google Earth-like satellite view as a separate raster layer. To obtain the output shown on the screenshots we use the following software.
- QGIS 2.14.3
- Value Tool Plugin, to visualize the elevation. Plugin info.
- QGIS2threejs Plugin, for the 3D render of the GIS data. Plugin page.
- Open Layer Plugin, to load in real time the Google Aerial Images into the GIS project. Installation indications here.
- GPS Tools Plugin. to load GPX files. Check also this short tutorial about the process.
The digital elevation data can be downloaded for free from Reverb Nasa service. You need to browse ASTER Global Digital Elevation Model V002 dataset . The NASA service requires registration prior to download. The data is divided is tiles or granules, Reverb interface will allow you to specify an interesting point with its latitude and longitude. After your selection, the site will list for you the granules containing data about your interesting points and allow you to order (for free) that data. After the order is completed you will receive an email with the download link to your selected granule/s. After you have gathered all the required plugins and downloaded the necessary DEM tiles you can proceed to the implementation phase, you find screenshots of the whole procedure in the following gallery.
At a glance :
- Load the GPX with the GPS Tools plugin
- Load Google Satellite images with Open Layer plugin
- Load DEM data from the downloaded Aster tile into a raster layer
- Using the DEM raster layer generate a vector layer with the elevations values. You will use the contour extraction tool in the raster menu, select one meter as the interval between contour lines.
- Play around a little with the value tool plugin.
- Launch QGIS2threejs. Set as DEM model the vector layer you generated in step 4.
- Enjoy your 3D landscape